Screw Drivers Track Editor Guide
Design custom maps, place checkpoints, and share your creations with the community.
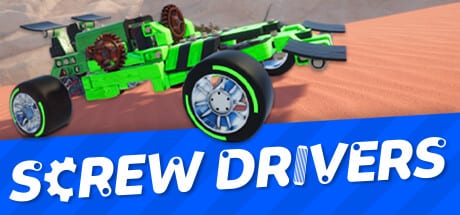
The track editor is one of the headline features of the Screw Drivers v1.0 full release. It lets you build custom maps from scratch using a grid-based placement system, then race on them in single-player or multiplayer. This guide walks through the editor interface, the available objects, and practical tips for designing tracks that are fun to drive.
Accessing the editor
The track editor is available from the main menu under the Custom section. New tracks are saved locally on your machine and can be shared with other players through the Steam Workshop. The editor loads in a separate scene from the main game, so be sure to save any in-progress vehicle work before opening it.
Editor interface overview
The editor splits into three main panels. The left panel contains the object library, which lists every item you can place. The center panel is the top-down view of your track. The right panel shows the properties of whatever object you currently have selected.
The top toolbar includes Save, Load, Undo, Redo, and a Test button that lets you drive the track without leaving the editor. Below the toolbar, you can switch between three grid sizes for fine or coarse placement.
Placeable objects
Terrain pieces
The terrain library includes flat road tiles, curved segments, slope pieces, and banked turns. You can mix asphalt and dirt tiles to create varied surfaces. Each terrain piece snaps to the grid, so connections are always clean.
Ramps and jumps
The ramp library includes straight ramps, banked ramps, half-pipes, and stunt ramps. Ramps can be tilted forward and backward to control the launch angle. Use small angles for realistic jumps, or steep angles for stunt tracks where players are expected to fly.
Decorations
Decorations include cones, flags, tyre stacks, wooden barricades, arrow signs, turn signs, lights, and crowd elements. v1.0 also added destructible cans. Some props are solid, some shatter. Place cones and flags along the racing line so Workshop subscribers can read the track at speed. Take a thumbnail from the editor before you upload.
Destructible objects
Some objects break when hit. Wooden barriers, stacked tires, and certain decorative pieces will shatter and disappear after a strong impact. Use destructible objects in stunt tracks where crashes are part of the experience.
Starting grids and checkpoints
Starting grids are required to run a race. Place a starting grid at the beginning of your track to set the spawn point. Checkpoints are placed along the track to define the racing line. Place checkpoints in the order you want players to pass through them.
Finish line
The finish line marks the end of a lap or race. Place one finish line per track. The game automatically detects lap completion when a vehicle crosses the finish line after passing all checkpoints.
Building your first track
Step 1: sketch the layout
Before placing any objects, plan the rough shape of your track. A simple oval is a good first project. Sketch the shape mentally, then use straight and curved tiles to build it.
Step 2: place terrain
Start with straight road tiles to define the long sections of your track. Use curved tiles to connect the straights. Make sure every tile is properly snapped to its neighbors — gaps between tiles cause the vehicle to bounce or get stuck.
Step 3: add checkpoints
Place one starting grid and at least three checkpoints before placing the finish line. Checkpoints define the racing line, so put them in spots that require skill — tight corners, jumps, narrow sections.
Step 4: add ramps and decorations
Once the basic track works, add ramps for jumps and decorations for visual flair. Test the track frequently as you add elements. A ramp that looks great on paper may launch the vehicle into a wall.
Step 5: test and refine
Use the Test button to drive the track yourself. Look for sections where the vehicle bounces, gets stuck, or feels unfair. Adjust the terrain or checkpoint placements until the track feels good.
Track design principles
Vary the corner types. A track with only 90-degree turns feels monotonous. Mix sharp turns, sweeping curves, chicanes, and hairpins to keep drivers engaged.
Use elevation changes. Flat tracks feel boring. Add climbs and descents using slope tiles and ramps. Elevation changes also create natural overtaking opportunities because faster vehicles catch up on downhills.
Leave runoff areas. If a driver misses a checkpoint, give them space to recover before the next obstacle. Tight tracks with no runoff feel punishing and discourage experimentation.
Match the track to the vehicle class. A track designed for high-speed racers will not work for slow off-road vehicles. Either design tracks for specific vehicle classes, or design tracks that have multiple viable lines so different vehicle types can succeed.
Sharing tracks
Once your track is finished, you can upload it to the Steam Workshop from the editor. Other players can subscribe to your track and race on it. You can also set difficulty ratings, descriptions, and tags to help players find your track.
To download and play other players’ tracks, browse the Workshop from the main menu and subscribe to anything that catches your eye. Subscribed tracks appear in your custom track list and can be raced on immediately.
Common mistakes
Forgetting to place checkpoints makes the track unraceable. The game cannot validate a track without checkpoints, so always verify before saving.
Connecting tiles at the wrong angle creates gaps. Use the rotate function to align tiles before snapping them. Tiles that look connected at a glance may have a tiny gap that catches wheels.
Placing ramps too close together causes vehicles to bounce uncontrollably. Give drivers flat sections between jumps so they can stabilize before the next stunt.
Overcrowding the track with decorations can make it hard to see the racing line. Use decorations sparingly along the edges, not in the middle of the track.
Related pages
- Builds for vehicle designs that work on custom tracks
- Multiplayer for racing custom tracks with friends
- Speed Builds for high-performance vehicles
Frequently Asked Questions
Quick answers to the most common questions.
Where do I find the track editor in Screw Drivers?
The track editor is in the main menu under the Custom section. It was added in the v1.0 full release on August 20, 2026.
Can I share custom tracks with friends?
Yes. Upload your track to the Steam Workshop from the editor. Friends can subscribe and race on your track immediately.
Do I need checkpoints for a custom track?
Yes. The game requires at least one starting grid and a series of checkpoints to validate a track. Tracks without checkpoints cannot be raced.
What is the maximum size of a custom track?
Tracks are limited by the editor grid, which is several hundred tiles per dimension. This is enough room for elaborate multi-section tracks. If you need a larger area, break the track into multiple maps.